CREATING A HANDHELD DEVICE
STEP BY STEP INSTRUCTIONS
G H
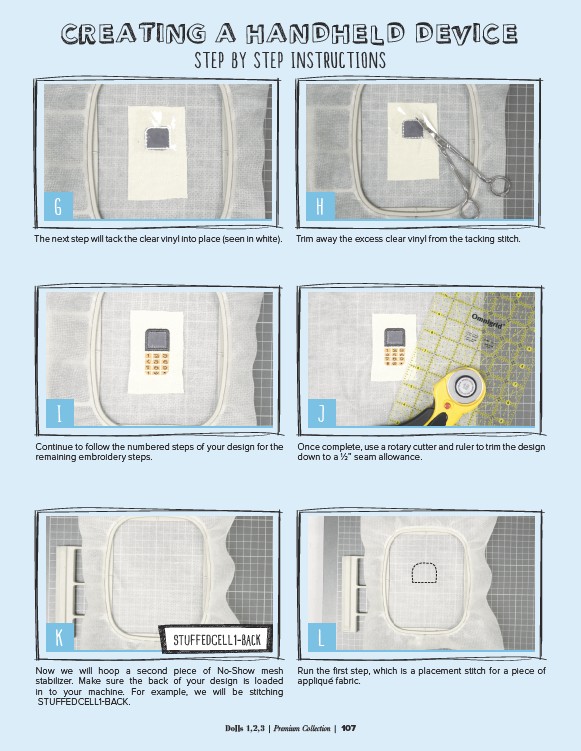
The next step will tack the clear vinyl into place (seen in white). Trim away the excess clear vinyl from the tacking stitch.
I J
Continue to follow the numbered steps of your design for the
remaining embroidery steps.
Once complete, use a rotary cutter and ruler to trim the design
down to a 1⁄2” seam allowance.
K STUFFEDCELL1-BACK
L
Now we will hoop a second piece of No-Show mesh
stabilizer. Make sure the back of your design is loaded
in to your machine. For example, we will be stitching
STUFFEDCELL1-BACK.
Run the first step, which is a placement stitch for a piece of
appliqué fabric.
Dolls 1,2,3 | Premium Collection | 107