CREATING THE LEGS
STEP BY STEP INSTRUCTIONS
S T
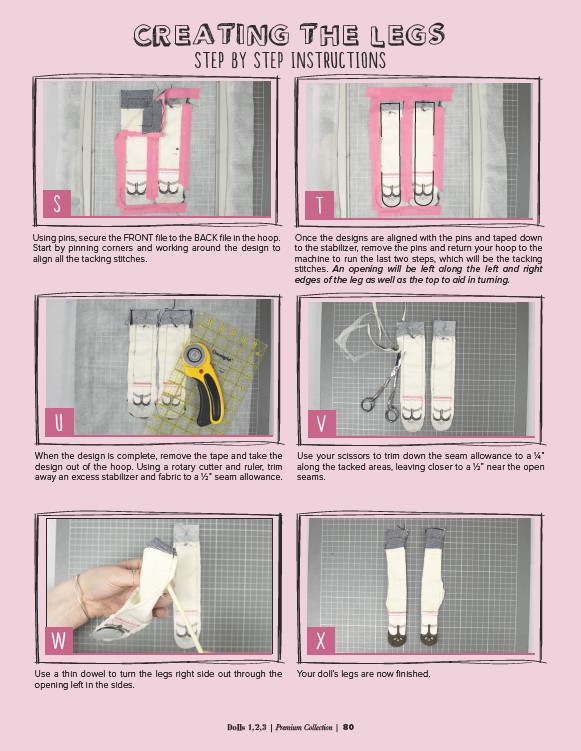
Using pins, secure the FRONT file to the BACK file in the hoop.
Start by pinning corners and working around the design to
align all the tacking stitches.
When the design is complete, remove the tape and take the
design out of the hoop. Using a rotary cutter and ruler, trim
away an excess stabilizer and fabric to a 1⁄2” seam allowance.
V
Use your scissors to trim down the seam allowance to a 1⁄4”
along the tacked areas, leaving closer to a 1⁄2” near the open
seams.
W X
Use a thin dowel to turn the legs right side out through the
opening left in the sides.
Your doll’s legs are now finished.
U
Once the designs are aligned with the pins and taped down
to the stabilizer, remove the pins and return your hoop to the
machine to run the last two steps, which will be the tacking
stitches. An opening will be left along the left and right
edges of the leg as well as the top to aid in turning.
Dolls 1,2,3 | Premium Collection | 80