step-by-step instructions
Project
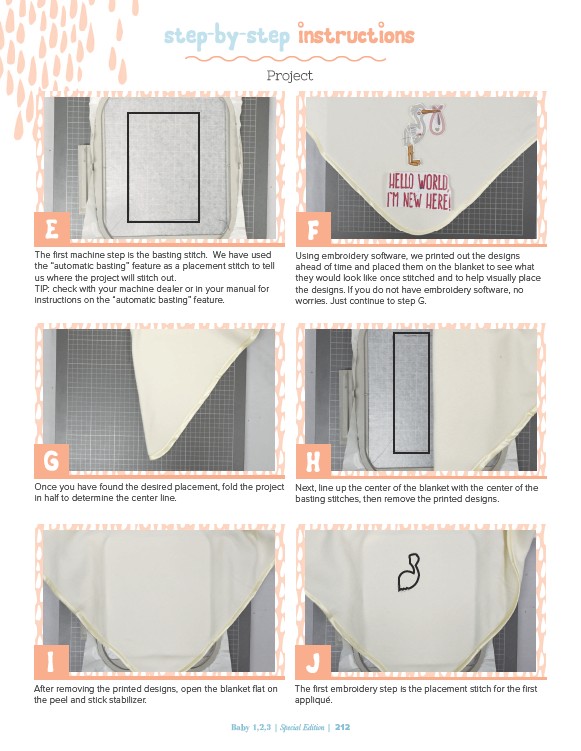
F
Using embroidery software, we printed out the designs
ahead of time and placed them on the blanket to see what
they would look like once stitched and to help visually place
the designs. If you do not have embroidery software, no
worries. Just continue to step G.
H
Next, line up the center of the blanket with the center of the
basting stitches, then remove the printed designs.
J
The first embroidery step is the placement stitch for the first
appliqué.
The first machine step is the basting stitch. We have used
the “automatic basting” feature as a placement stitch to tell
us where the project will stitch out.
TIP: check with your machine dealer or in your manual for
instructions on the “automatic basting” feature.
Once you have found the desired placement, fold the project
in half to determine the center line.
After removing the printed designs, open the blanket flat on
the peel and stick stabilizer.
Baby 1,2,3 | Special Edition | 212
E
G
I