CREATING A BAG
STEP BY STEP INSTRUCTIONS
EE FF
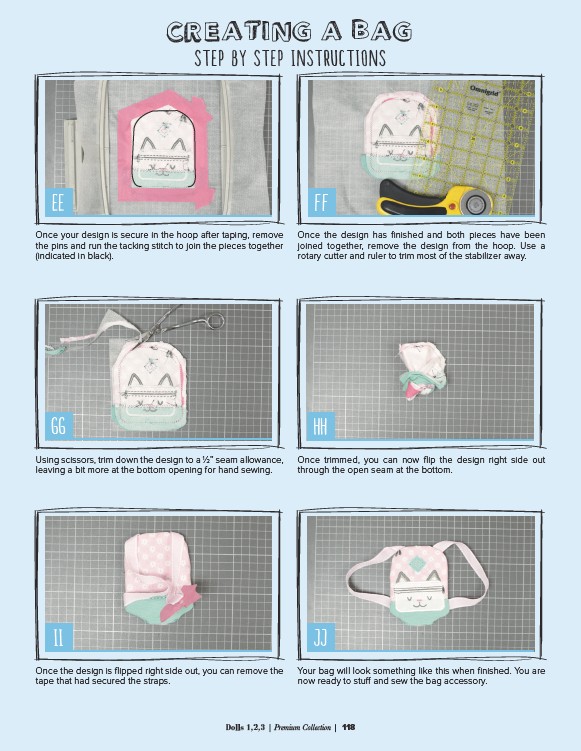
Once your design is secure in the hoop after taping, remove
the pins and run the tacking stitch to join the pieces together
(indicated in black).
Once the design has finished and both pieces have been
joined together, remove the design from the hoop. Use a
rotary cutter and ruler to trim most of the stabilizer away.
GG HH
Using scissors, trim down the design to a 1⁄2” seam allowance,
leaving a bit more at the bottom opening for hand sewing.
Once trimmed, you can now flip the design right side out
through the open seam at the bottom.
II JJ
Once the design is flipped right side out, you can remove the
tape that had secured the straps.
Your bag will look something like this when finished. You are
now ready to stuff and sew the bag accessory.
Dolls 1,2,3 | Premium Collection | 118