CREATING THE LEGS
STEP BY STEP INSTRUCTIONS
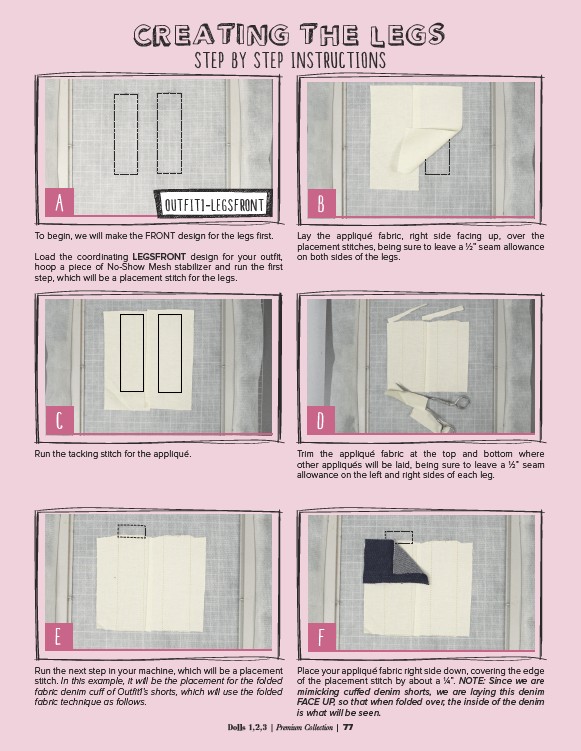
To begin, we will make the FRONT design for the legs first.
Load the coordinating LEGSFRONT design for your outfit,
hoop a piece of No-Show Mesh stabilizer and run the first
step, which will be a placement stitch for the legs.
B
Lay the appliqué fabric, right side facing up, over the
placement stitches, being sure to leave a 1⁄2” seam allowance
on both sides of the legs.
C D
Run the tacking stitch for the appliqué. Trim the appliqué fabric at the top and bottom where
other appliqués will be laid, being sure to leave a 1⁄2” seam
allowance on the left and right sides of each leg.
E F
Run the next step in your machine, which will be a placement
stitch. In this example, it will be the placement for the folded
fabric denim cuff of Outfit1’s shorts, which will use the folded
fabric technique as follows.
Place your appliqué fabric right side down, covering the edge
of the placement stitch by about a 1⁄4”. NOTE: Since we are
mimicking cuffed denim shorts, we are laying this denim
FACE UP, so that when folded over, the inside of the denim
is what will be seen.
A OUTFIT1-LEGSFRONT
Dolls 1,2,3 | Premium Collection | 77