CREATING YOUR DOLL BODY
STEP BY STEP INSTRUCTIONS
S T
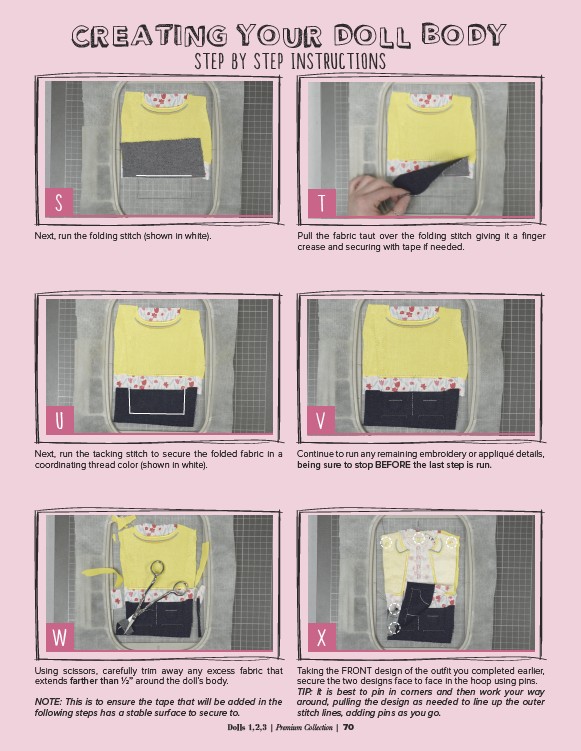
Next, run the folding stitch (shown in white). Pull the fabric taut over the folding stitch giving it a finger
crease and securing with tape if needed.
U V
Next, run the tacking stitch to secure the folded fabric in a
coordinating thread color (shown in white).
Continue to run any remaining embroidery or appliqué details,
being sure to stop BEFORE the last step is run.
W X
Using scissors, carefully trim away any excess fabric that
extends farther than 1⁄2” around the doll’s body.
NOTE: This is to ensure the tape that will be added in the
following steps has a stable surface to secure to.
Taking the FRONT design of the outfit you completed earlier,
secure the two designs face to face in the hoop using pins.
TIP: It is best to pin in corners and then work your way
around, pulling the design as needed to line up the outer
stitch lines, adding pins as you go.
Dolls 1,2,3 | Premium Collection | 70