19 20
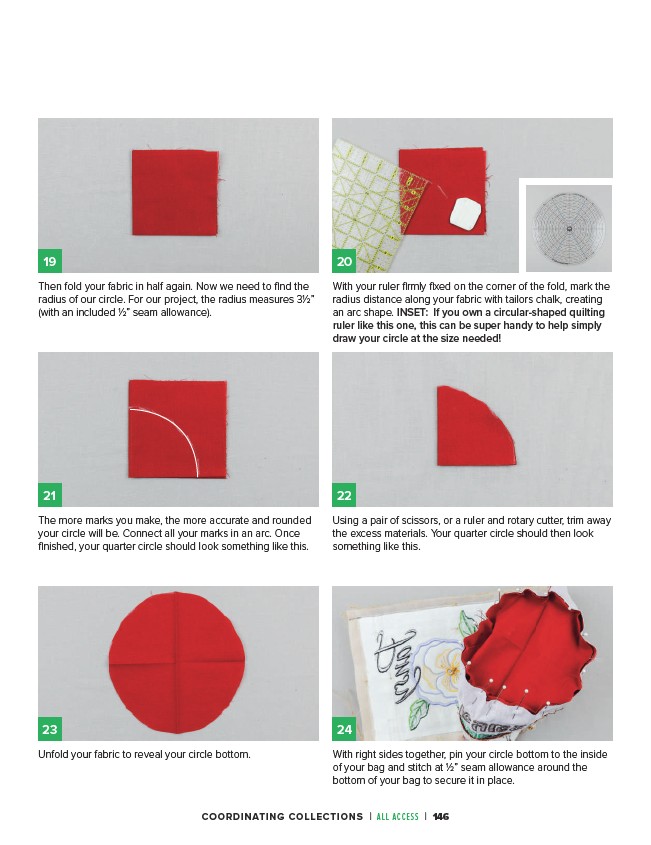
With your ruler firmly fixed on the corner of the fold, mark the
radius distance along your fabric with tailors chalk, creating
an arc shape. INSET: If you own a circular-shaped quilting
ruler like this one, this can be super handy to help simply
draw your circle at the size needed!
Then fold your fabric in half again. Now we need to find the
radius of our circle. For our project, the radius measures 31⁄2”
(with an included 1⁄2” seam allowance).
21 22
The more marks you make, the more accurate and rounded
your circle will be. Connect all your marks in an arc. Once
finished, your quarter circle should look something like this.
Using a pair of scissors, or a ruler and rotary cutter, trim away
the excess materials. Your quarter circle should then look
something like this.
23 24
Unfold your fabric to reveal your circle bottom. With right sides together, pin your circle bottom to the inside
of your bag and stitch at 1⁄2” seam allowance around the
bottom of your bag to secure it in place.
COORDINATING COLLECTIONS | ALL ACCESS | 146