25 26
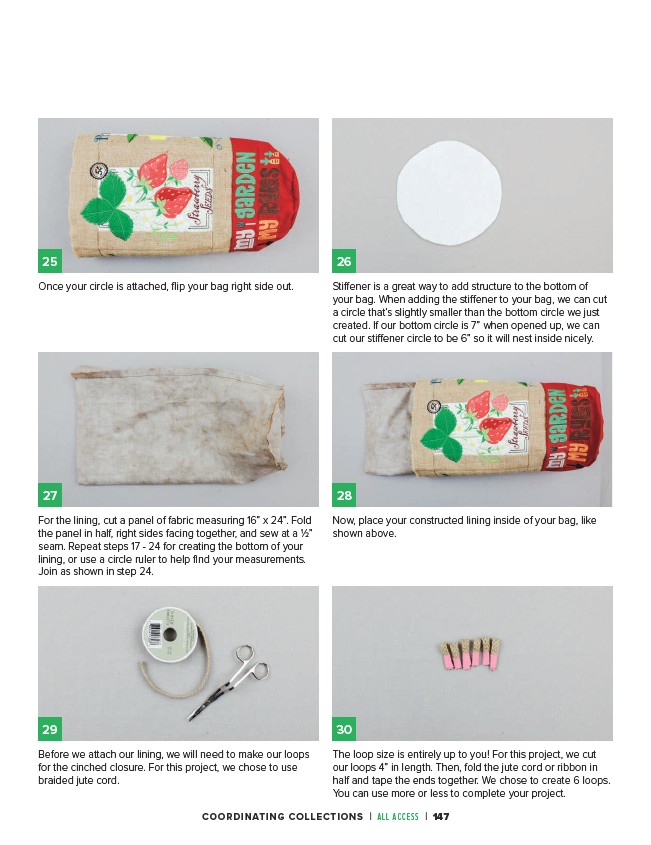
Stiffener is a great way to add structure to the bottom of
your bag. When adding the stiffener to your bag, we can cut
a circle that’s slightly smaller than the bottom circle we just
created. If our bottom circle is 7” when opened up, we can
cut our stiffener circle to be 6” so it will nest inside nicely.
Once your circle is attached, flip your bag right side out.
27 28
For the lining, cut a panel of fabric measuring 16” x 24”. Fold
the panel in half, right sides facing together, and sew at a 1⁄2”
seam. Repeat steps 17 - 24 for creating the bottom of your
lining, or use a circle ruler to help find your measurements.
Join as shown in step 24.
Now, place your constructed lining inside of your bag, like
shown above.
29 30
Before we attach our lining, we will need to make our loops
for the cinched closure. For this project, we chose to use
braided jute cord.
The loop size is entirely up to you! For this project, we cut
our loops 4” in length. Then, fold the jute cord or ribbon in
half and tape the ends together. We chose to create 6 loops.
You can use more or less to complete your project.
COORDINATING COLLECTIONS | ALL ACCESS | 147