M N
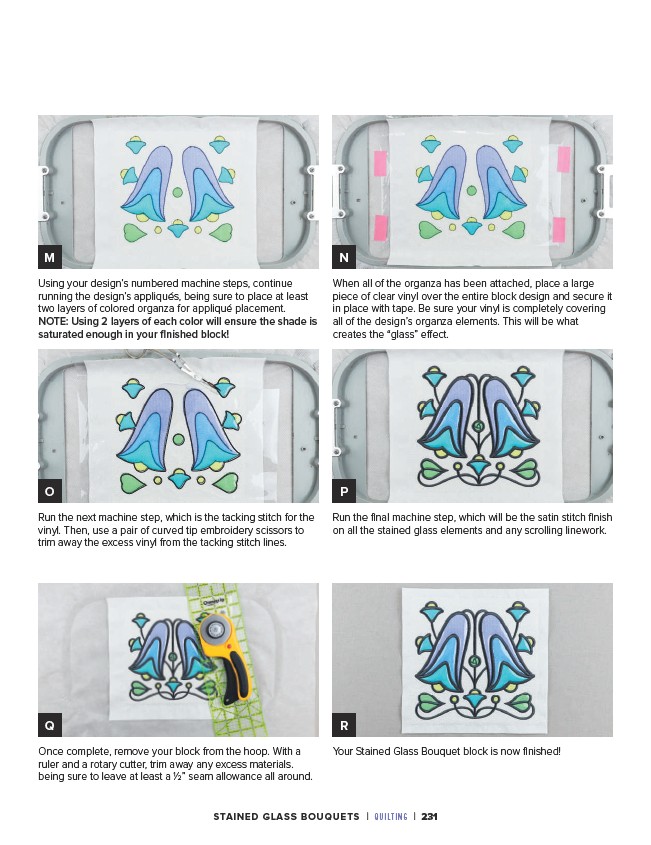
When all of the organza has been attached, place a large
piece of clear vinyl over the entire block design and secure it
in place with tape. Be sure your vinyl is completely covering
all of the design’s organza elements. This will be what
creates the “glass” effect.
O P
Run the next machine step, which is the tacking stitch for the
vinyl. Then, use a pair of curved tip embroidery scissors to
trim away the excess vinyl from the tacking stitch lines.
Run the final machine step, which will be the satin stitch finish
on all the stained glass elements and any scrolling linework.
Q R
Once complete, remove your block from the hoop. With a
ruler and a rotary cutter, trim away any excess materials.
being sure to leave at least a 1⁄2” seam allowance all around.
Your Stained Glass Bouquet block is now finished!
Using your design’s numbered machine steps, continue
running the design’s appliqués, being sure to place at least
two layers of colored organza for appliqué placement.
NOTE: Using 2 layers of each color will ensure the shade is
saturated enough in your finished block!
STAINED GLASS BOUQUETS | QUILTING | 231