JOINING YOUR TILE SCENE BLOCKS
STEP-BY-STEP INSTRUCTIONS
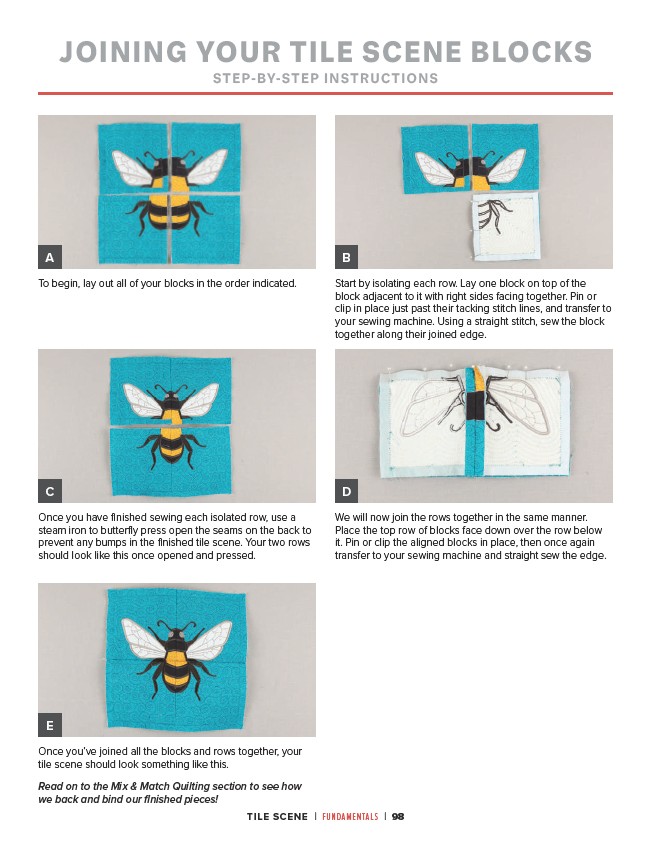
To begin, lay out all of your blocks in the order indicated. Start by isolating each row. Lay one block on top of the
block adjacent to it with right sides facing together. Pin or
clip in place just past their tacking stitch lines, and transfer to
your sewing machine. Using a straight stitch, sew the block
together along their joined edge.
Once you have finished sewing each isolated row, use a
steam iron to butterfly press open the seams on the back to
prevent any bumps in the finished tile scene. Your two rows
should look like this once opened and pressed.
Once you’ve joined all the blocks and rows together, your
tile scene should look something like this.
Read on to the Mix & Match Quilting section to see how
we back and bind our finished pieces!
We will now join the rows together in the same manner.
Place the top row of blocks face down over the row below
it. Pin or clip the aligned blocks in place, then once again
transfer to your sewing machine and straight sew the edge.
TILE SCENE | FUNDAMENTALS | 98
A
C
E
B
D