CREATING THE ZIPPER BAG
STEP-BY-STEP INSTRUCTIONS
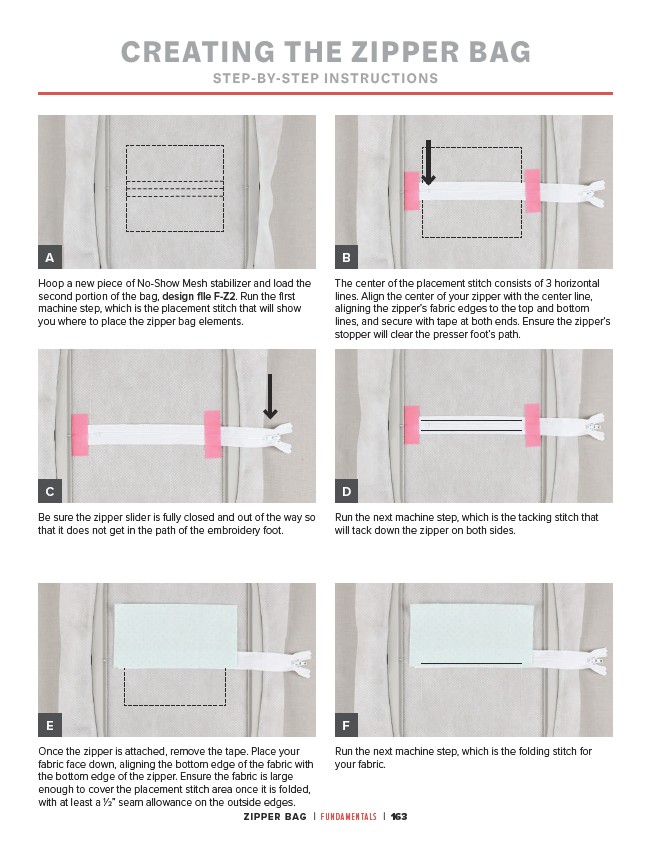
Hoop a new piece of No-Show Mesh stabilizer and load the
second portion of the bag, design file F-Z2. Run the first
machine step, which is the placement stitch that will show
you where to place the zipper bag elements.
The center of the placement stitch consists of 3 horizontal
lines. Align the center of your zipper with the center line,
aligning the zipper’s fabric edges to the top and bottom
lines, and secure with tape at both ends. Ensure the zipper’s
stopper will clear the presser foot’s path.
Be sure the zipper slider is fully closed and out of the way so
that it does not get in the path of the embroidery foot.
Once the zipper is attached, remove the tape. Place your
fabric face down, aligning the bottom edge of the fabric with
the bottom edge of the zipper. Ensure the fabric is large
enough to cover the placement stitch area once it is folded,
with at least a 1⁄2” seam allowance on the outside edges.
Run the next machine step, which is the tacking stitch that
will tack down the zipper on both sides.
Run the next machine step, which is the folding stitch for
your fabric.
ZIPPER BAG | FUNDAMENTALS | 163
A
C
E
B
D
F