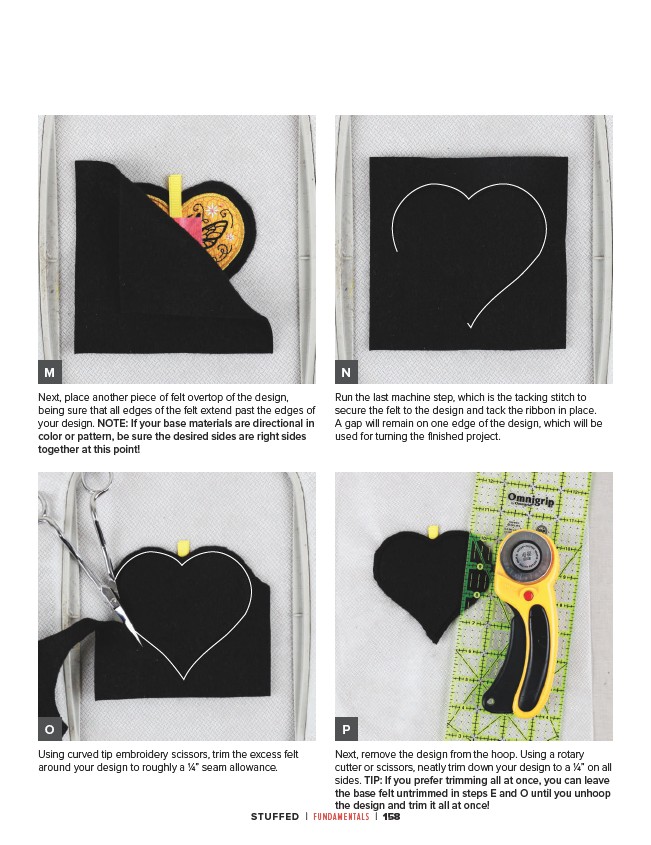
Next, place another piece of felt overtop of the design,
being sure that all edges of the felt extend past the edges of
your design. NOTE: If your base materials are directional in
color or pattern, be sure the desired sides are right sides
together at this point!
Run the last machine step, which is the tacking stitch to
secure the felt to the design and tack the ribbon in place.
A gap will remain on one edge of the design, which will be
used for turning the finished project.
Using curved tip embroidery scissors, trim the excess felt
around your design to roughly a 1⁄4” seam allowance.
Next, remove the design from the hoop. Using a rotary
cutter or scissors, neatly trim down your design to a 1⁄4” on all
sides. TIP: If you prefer trimming all at once, you can leave
the base felt untrimmed in steps E and O until you unhoop
the design and trim it all at once!
STUFFED | FUNDAMENTALS | 158
M
O
N
P