STITCHING THE BACK FILE
STEP-BY-STEP INSTRUCTIONS
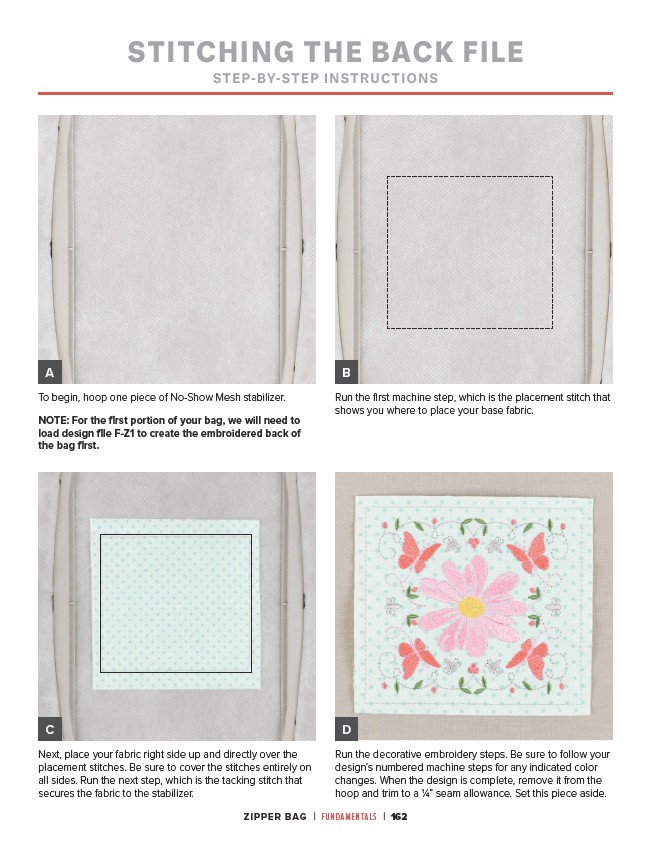
To begin, hoop one piece of No-Show Mesh stabilizer.
NOTE: For the first portion of your bag, we will need to
load design file F-Z1 to create the embroidered back of
the bag first.
Run the first machine step, which is the placement stitch that
shows you where to place your base fabric.
Next, place your fabric right side up and directly over the
placement stitches. Be sure to cover the stitches entirely on
all sides. Run the next step, which is the tacking stitch that
secures the fabric to the stabilizer.
Run the decorative embroidery steps. Be sure to follow your
design’s numbered machine steps for any indicated color
changes. When the design is complete, remove it from the
hoop and trim to a 1⁄4” seam allowance. Set this piece aside.
ZIPPER BAG | FUNDAMENTALS | 162
A
C
B
D