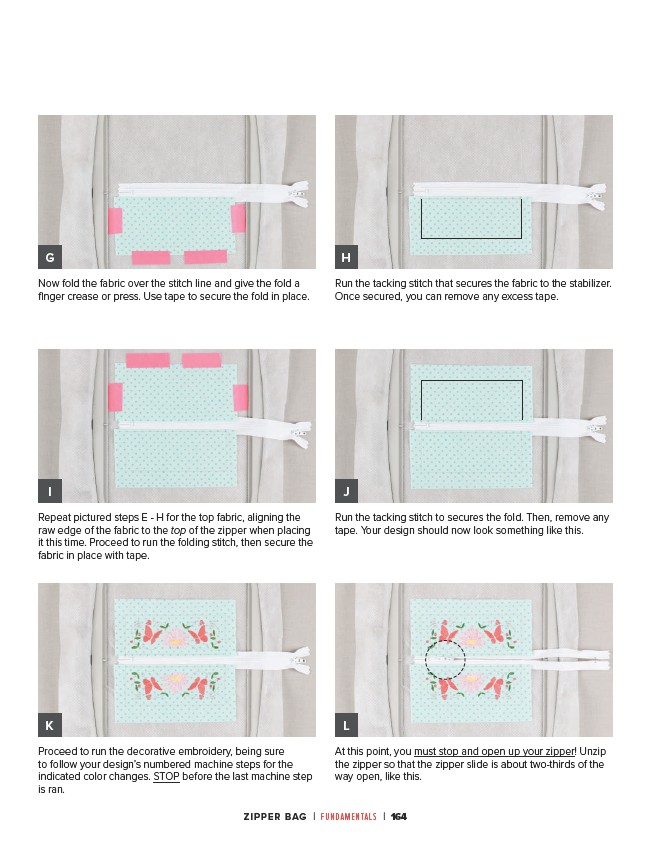
Now fold the fabric over the stitch line and give the fold a
finger crease or press. Use tape to secure the fold in place.
Run the tacking stitch that secures the fabric to the stabilizer.
Once secured, you can remove any excess tape.
Repeat pictured steps E - H for the top fabric, aligning the
raw edge of the fabric to the top of the zipper when placing
it this time. Proceed to run the folding stitch, then secure the
fabric in place with tape.
Proceed to run the decorative embroidery, being sure
to follow your design’s numbered machine steps for the
indicated color changes. STOP before the last machine step
is ran.
Run the tacking stitch to secures the fold. Then, remove any
tape. Your design should now look something like this.
At this point, you must stop and open up your zipper! Unzip
the zipper so that the zipper slide is about two-thirds of the
way open, like this.
ZIPPER BAG | FUNDAMENTALS | 164
G
I
K
H
J
L