STITCHING OUT NEEDLEPOINT
STEP-BY-STEP INSTRUCTIONS
A B
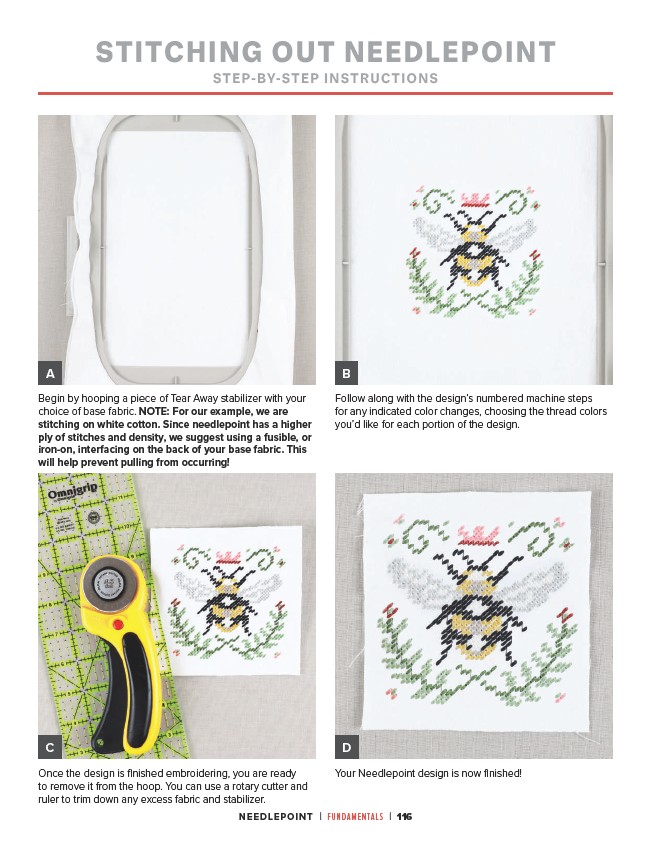
Begin by hooping a piece of Tear Away stabilizer with your
choice of base fabric. NOTE: For our example, we are
stitching on white cotton. Since needlepoint has a higher
ply of stitches and density, we suggest using a fusible, or
iron-on, interfacing on the back of your base fabric. This
will help prevent pulling from occurring!
Follow along with the design’s numbered machine steps
for any indicated color changes, choosing the thread colors
you’d like for each portion of the design.
Once the design is finished embroidering, you are ready
to remove it from the hoop. You can use a rotary cutter and
ruler to trim down any excess fabric and stabilizer.
D
NEEDLEPOINT | FUNDAMENTALS | 116
C
Your Needlepoint design is now finished!