PRINTING OUT YOUR FABRIC
STEP-BY-STEP INSTRUCTIONS
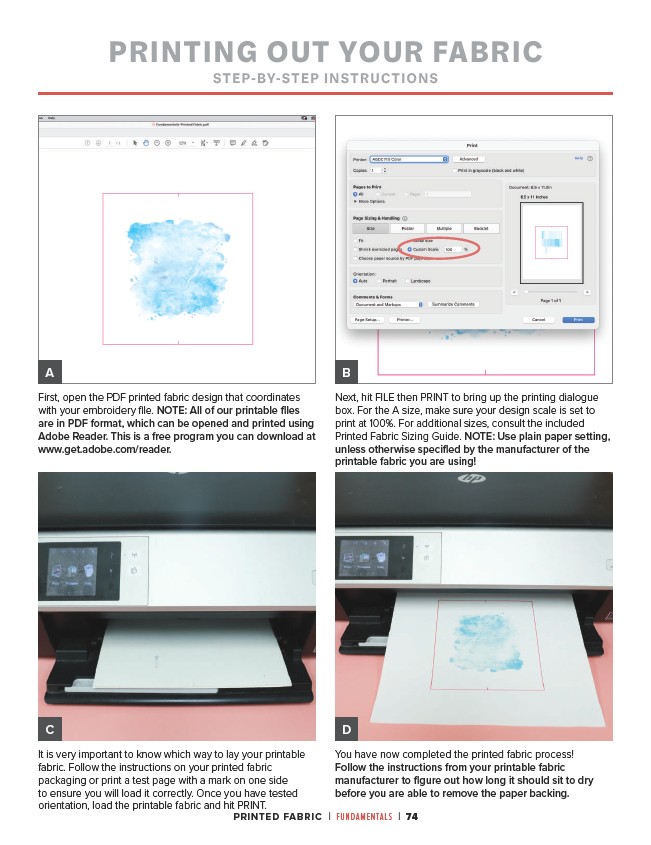
First, open the PDF printed fabric design that coordinates
with your embroidery file. NOTE: All of our printable files
are in PDF format, which can be opened and printed using
Adobe Reader. This is a free program you can download at
www.get.adobe.com/reader.
Next, hit FILE then PRINT to bring up the printing dialogue
box. For the A size, make sure your design scale is set to
print at 100%. For additional sizes, consult the included
Printed Fabric Sizing Guide. NOTE: Use plain paper setting,
unless otherwise specified by the manufacturer of the
printable fabric you are using!
It is very important to know which way to lay your printable
fabric. Follow the instructions on your printed fabric
packaging or print a test page with a mark on one side
to ensure you will load it correctly. Once you have tested
orientation, load the printable fabric and hit PRINT.
You have now completed the printed fabric process!
Follow the instructions from your printable fabric
manufacturer to figure out how long it should sit to dry
before you are able to remove the paper backing.
PRINTED FABRIC | FUNDAMENTALS | 74
A
C
B
D
/reader