CREATING AN EMBROIDERED CARD
STEP-BY-STEP INSTRUCTIONS
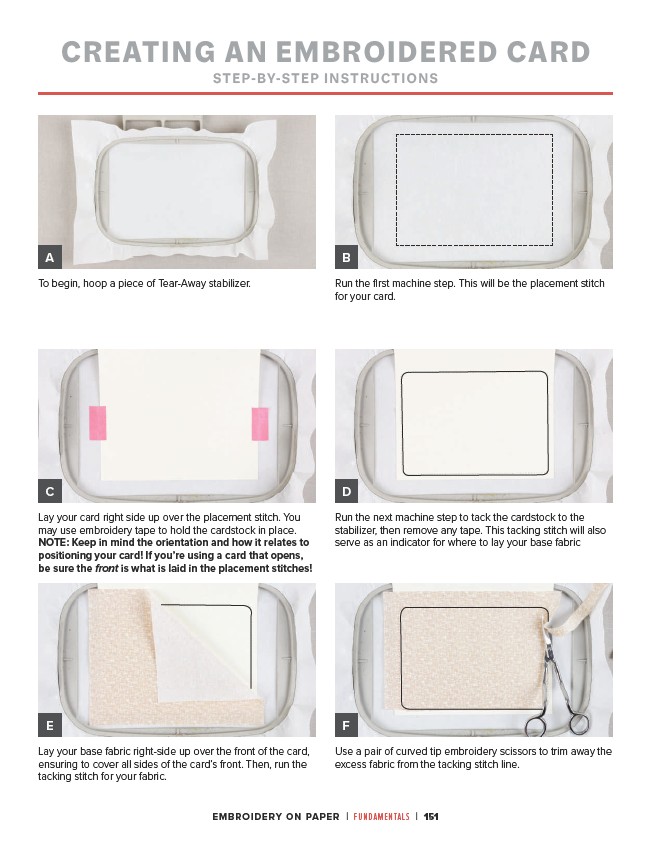
To begin, hoop a piece of Tear-Away stabilizer. Run the first machine step. This will be the placement stitch
for your card.
Lay your card right side up over the placement stitch. You
may use embroidery tape to hold the cardstock in place.
NOTE: Keep in mind the orientation and how it relates to
positioning your card! If you’re using a card that opens,
be sure the front is what is laid in the placement stitches!
Lay your base fabric right-side up over the front of the card,
ensuring to cover all sides of the card’s front. Then, run the
tacking stitch for your fabric.
Run the next machine step to tack the cardstock to the
stabilizer, then remove any tape. This tacking stitch will also
serve as an indicator for where to lay your base fabric
Use a pair of curved tip embroidery scissors to trim away the
excess fabric from the tacking stitch line.
EMBROIDERY ON PAPER | FUNDAMENTALS | 151
A
C
E
B
D
F