Y Z
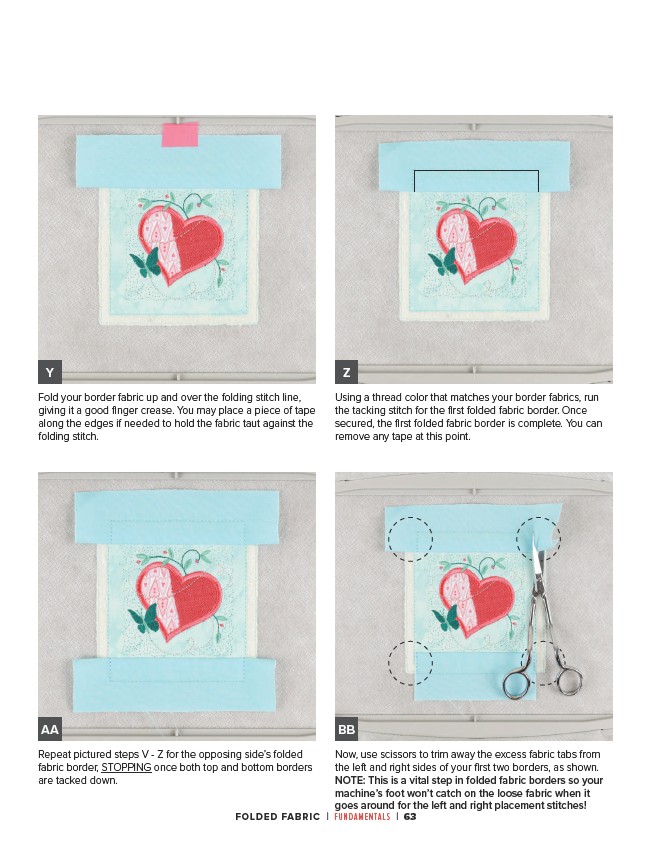
Fold your border fabric up and over the folding stitch line,
giving it a good finger crease. You may place a piece of tape
along the edges if needed to hold the fabric taut against the
folding stitch.
Using a thread color that matches your border fabrics, run
the tacking stitch for the first folded fabric border. Once
secured, the first folded fabric border is complete. You can
remove any tape at this point.
AA BB
Repeat pictured steps V - Z for the opposing side’s folded
fabric border, STOPPING once both top and bottom borders
are tacked down.
Now, use scissors to trim away the excess fabric tabs from
the left and right sides of your first two borders, as shown.
NOTE: This is a vital step in folded fabric borders so your
machine’s foot won’t catch on the loose fabric when it
goes around for the left and right placement stitches!
FOLDED FABRIC | FUNDAMENTALS | 63