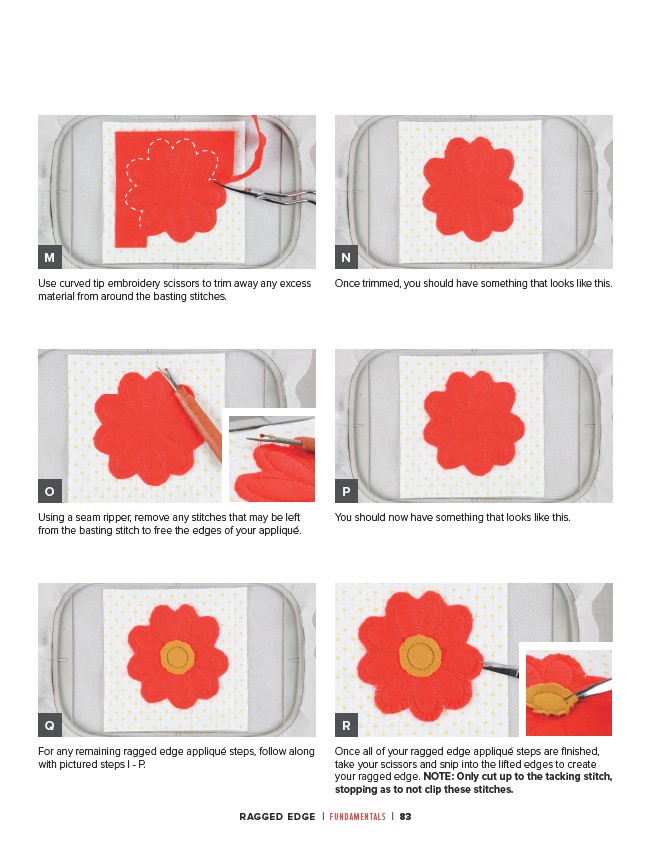
Use curved tip embroidery scissors to trim away any excess
material from around the basting stitches.
Once trimmed, you should have something that looks like this.
Using a seam ripper, remove any stitches that may be left
from the basting stitch to free the edges of your appliqué.
For any remaining ragged edge appliqué steps, follow along
with pictured steps I - P.
You should now have something that looks like this.
Once all of your ragged edge appliqué steps are finished,
take your scissors and snip into the lifted edges to create
your ragged edge. NOTE: Only cut up to the tacking stitch,
stopping as to not clip these stitches.
RAGGED EDGE | FUNDAMENTALS | 83
M
O
Q
N
P
R