CREATING AND ASSEMBLING THE BAG
STEP-BY-STEP INSTRUCTIONS
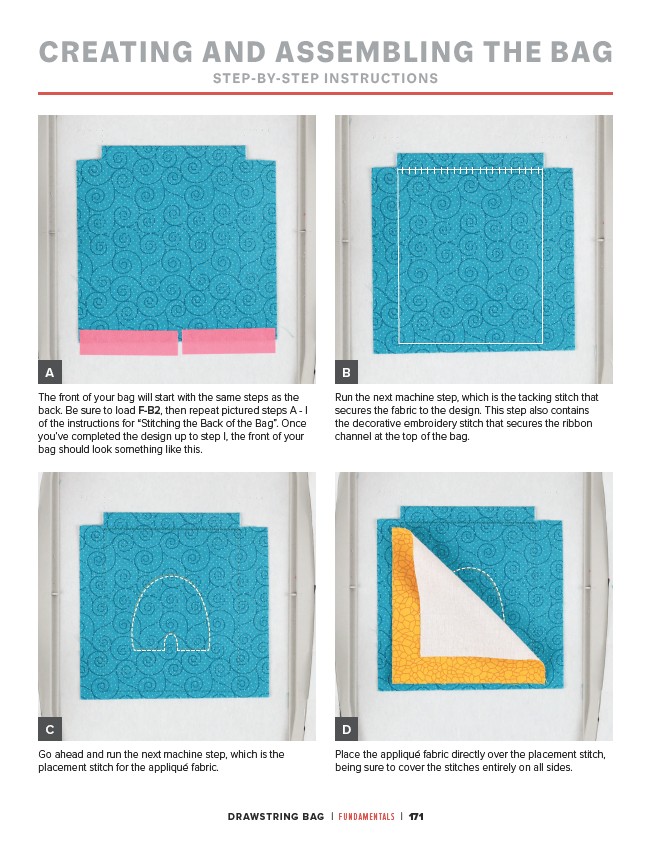
The front of your bag will start with the same steps as the
back. Be sure to load F-B2, then repeat pictured steps A - I
of the instructions for “Stitching the Back of the Bag”. Once
you’ve completed the design up to step I, the front of your
bag should look something like this.
Run the next machine step, which is the tacking stitch that
secures the fabric to the design. This step also contains
the decorative embroidery stitch that secures the ribbon
channel at the top of the bag.
Go ahead and run the next machine step, which is the
placement stitch for the appliqué fabric.
Place the appliqué fabric directly over the placement stitch,
being sure to cover the stitches entirely on all sides.
DRAWSTRING BAG | FUNDAMENTALS | 171
A
C
B
D