FINISHING QUILTS & TILE SCENES
STEP-BY-STEP INSTRUCTIONS
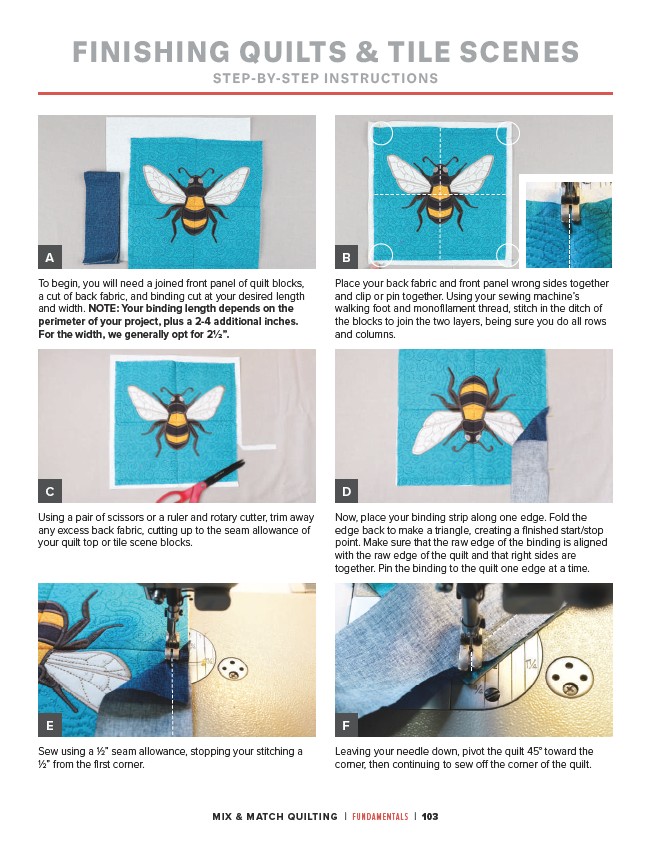
To begin, you will need a joined front panel of quilt blocks,
a cut of back fabric, and binding cut at your desired length
and width. NOTE: Your binding length depends on the
perimeter of your project, plus a 2-4 additional inches.
For the width, we generally opt for 21⁄2”.
Place your back fabric and front panel wrong sides together
and clip or pin together. Using your sewing machine’s
walking foot and monofilament thread, stitch in the ditch of
the blocks to join the two layers, being sure you do all rows
and columns.
Using a pair of scissors or a ruler and rotary cutter, trim away
any excess back fabric, cutting up to the seam allowance of
your quilt top or tile scene blocks.
Sew using a ½” seam allowance, stopping your stitching a
½” from the first corner.
Now, place your binding strip along one edge. Fold the
edge back to make a triangle, creating a finished start/stop
point. Make sure that the raw edge of the binding is aligned
with the raw edge of the quilt and that right sides are
together. Pin the binding to the quilt one edge at a time.
Leaving your needle down, pivot the quilt 45° toward the
corner, then continuing to sew off the corner of the quilt.
MIX & MATCH QUILTING | FUNDAMENTALS | 103
A
C
E
B
D
F