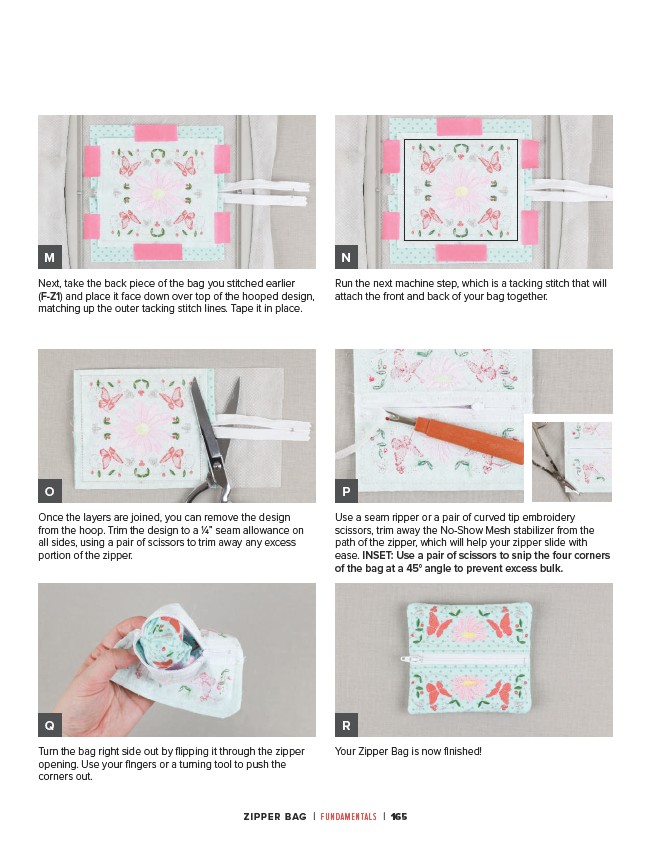
Next, take the back piece of the bag you stitched earlier
(F-Z1) and place it face down over top of the hooped design,
matching up the outer tacking stitch lines. Tape it in place.
Run the next machine step, which is a tacking stitch that will
attach the front and back of your bag together.
Once the layers are joined, you can remove the design
from the hoop. Trim the design to a 1⁄4” seam allowance on
all sides, using a pair of scissors to trim away any excess
portion of the zipper.
Turn the bag right side out by flipping it through the zipper
opening. Use your fingers or a turning tool to push the
corners out.
Use a seam ripper or a pair of curved tip embroidery
scissors, trim away the No-Show Mesh stabilizer from the
path of the zipper, which will help your zipper slide with
ease. INSET: Use a pair of scissors to snip the four corners
of the bag at a 45° angle to prevent excess bulk.
Your Zipper Bag is now finished!
ZIPPER BAG | FUNDAMENTALS | 165
M
O
Q
N
P
R