247
S T
FINISHING YOUR QUILT - STEP BY STEP
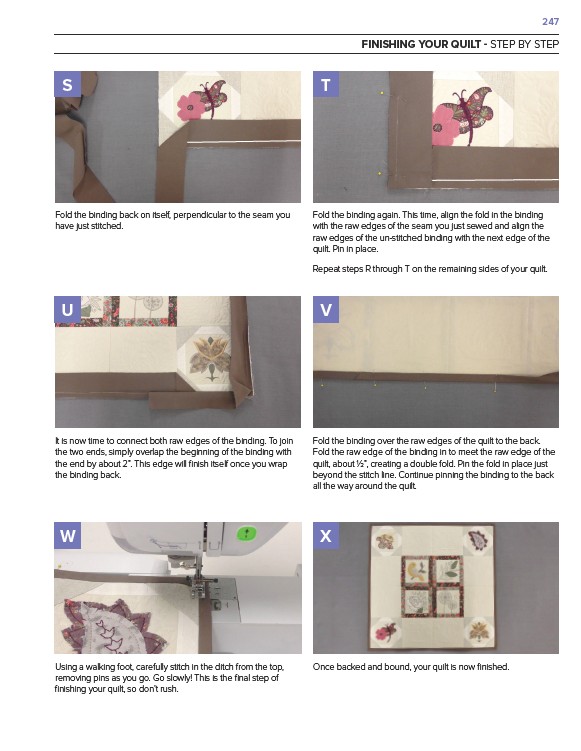
Fold the binding again. This time, align the fold in the binding
with the raw edges of the seam you just sewed and align the
raw edges of the un-stitched binding with the next edge of the
quilt. Pin in place.
Repeat steps R through T on the remaining sides of your quilt.
Fold the binding back on itself, perpendicular to the seam you
have just stitched.
V
Fold the binding over the raw edges of the quilt to the back.
Fold the raw edge of the binding in to meet the raw edge of the
quilt, about ½”, creating a double fold. Pin the fold in place just
beyond the stitch line. Continue pinning the binding to the back
all the way around the quilt.
U
It is now time to connect both raw edges of the binding. To join
the two ends, simply overlap the beginning of the binding with
the end by about 2”. This edge will finish itself once you wrap
the binding back.
W
X
Using a walking foot, carefully stitch in the ditch from the top, Once backed and bound, your quilt is now finished.
removing pins as you go. Go slowly! This is the final step of
finishing your quilt, so don’t rush.