48
A B
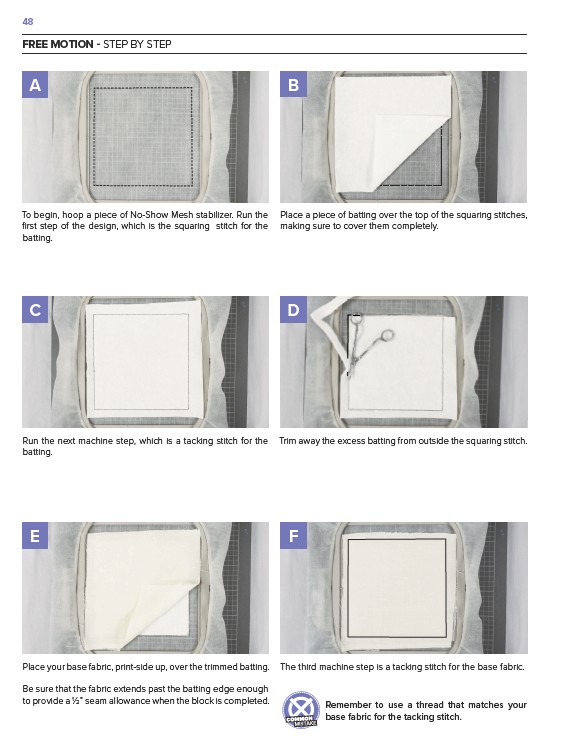
Place a piece of batting over the top of the squaring stitches,
making sure to cover them completely.
FREE MOTION - STEP BY STEP
To begin, hoop a piece of No-Show Mesh stabilizer. Run the
first step of the design, which is the squaring stitch for the
batting.
C
D
Run the next machine step, which is a tacking stitch for the Trim away the excess batting from outside the squaring stitch.
batting.
E
F
Place your base fabric, print-side up, over the trimmed batting. The third machine step is a tacking stitch for the base fabric.
Be sure that the fabric extends past the batting edge enough
to provide a 1⁄2” seam allowance when the block is completed.
Remember to use a thread that matches your
base fabric for the tacking stitch.