62
BASIC FOLDED FABRIC BLOCK - ANATOMY OF THE DESIGN
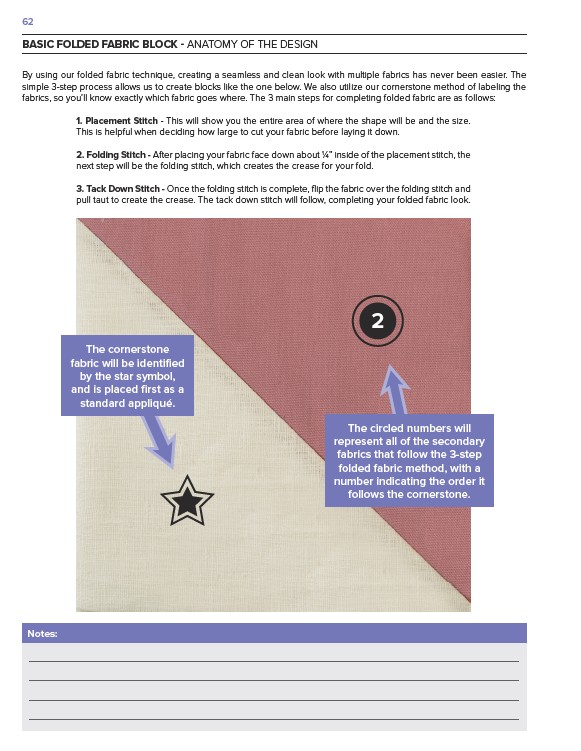
By using our folded fabric technique, creating a seamless and clean look with multiple fabrics has never been easier. The
simple 3-step process allows us to create blocks like the one below. We also utilize our cornerstone method of labeling the
fabrics, so you’ll know exactly which fabric goes where. The 3 main steps for completing folded fabric are as follows:
Notes:
1. Placement Stitch - This will show you the entire area of where the shape will be and the size.
This is helpful when deciding how large to cut your fabric before laying it down.
2. Folding Stitch - After placing your fabric face down about 1⁄4” inside of the placement stitch, the
next step will be the folding stitch, which creates the crease for your fold.
3. Tack Down Stitch - Once the folding stitch is complete, flip the fabric over the folding stitch and
pull taut to create the crease. The tack down stitch will follow, completing your folded fabric look.
2
The cornerstone
fabric will be identified
by the star symbol,
and is placed first as a
standard appliqué.
The circled numbers will
represent all of the secondary
fabrics that follow the 3-step
folded fabric method, with a
number indicating the order it
follows the cornerstone.