82
RADIAL BLOCK - STEP BY STEP
A B
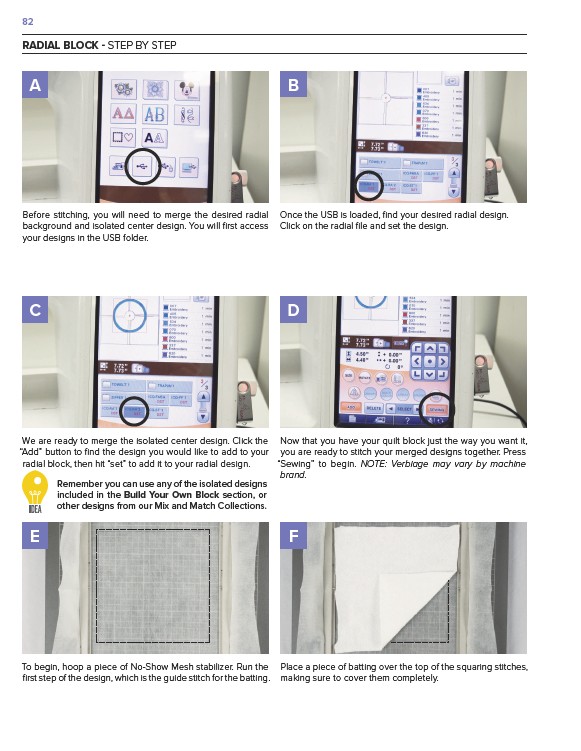
Once the USB is loaded, find your desired radial design.
Click on the radial file and set the design.
Before stitching, you will need to merge the desired radial
background and isolated center design. You will first access
your designs in the USB folder.
Now that you have your quilt block just the way you want it,
you are ready to stitch your merged designs together. Press
“Sewing” to begin. NOTE: Verbiage may vary by machine
brand.
C
We are ready to merge the isolated center design. Click the
“Add” button to find the design you would like to add to your
radial block, then hit “set” to add it to your radial design.
E
D
F
Remember you can use any of the isolated designs
included in the Build Your Own Block section, or
other designs from our Mix and Match Collections.
Place a piece of batting over the top of the squaring stitches,
making sure to cover them completely.
To begin, hoop a piece of No-Show Mesh stabilizer. Run the
first step of the design, which is the guide stitch for the batting.