92
STANDARD APPLIQUÉ - ANATOMY OF THE DESIGN
Notes:
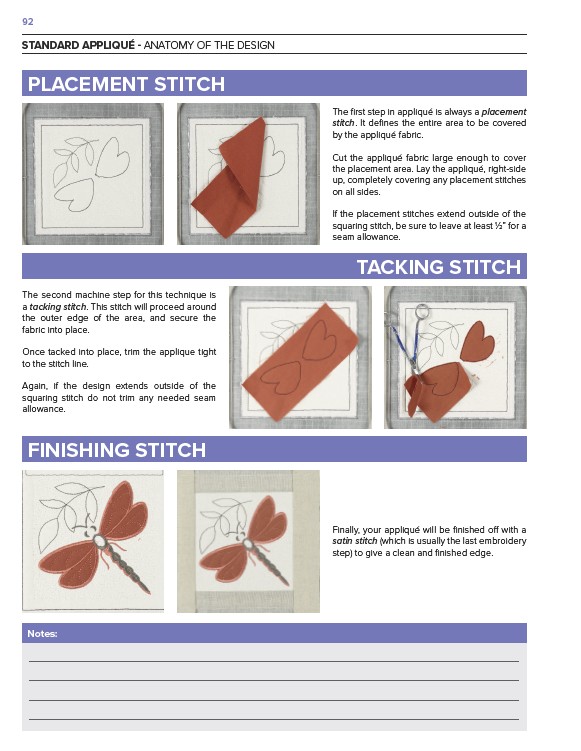
The first step in appliqué is always a placement
stitch. It defines the entire area to be covered
by the appliqué fabric.
Cut the appliqué fabric large enough to cover
the placement area. Lay the appliqué, right-side
up, completely covering any placement stitches
on all sides.
If the placement stitches extend outside of the
squaring stitch, be sure to leave at least 1⁄2” for a
seam allowance.
PLACEMENT STITCH
FINISHING STITCH
TACKING STITCH
The second machine step for this technique is
a tacking stitch. This stitch will proceed around
the outer edge of the area, and secure the
fabric into place.
Once tacked into place, trim the applique tight
to the stitch line.
Again, if the design extends outside of the
squaring stitch do not trim any needed seam
allowance.
Finally, your appliqué will be finished off with a
satin stitch (which is usually the last embroidery
step) to give a clean and finished edge.