Making the 3D Element
Step-by-Step Instructions
A B
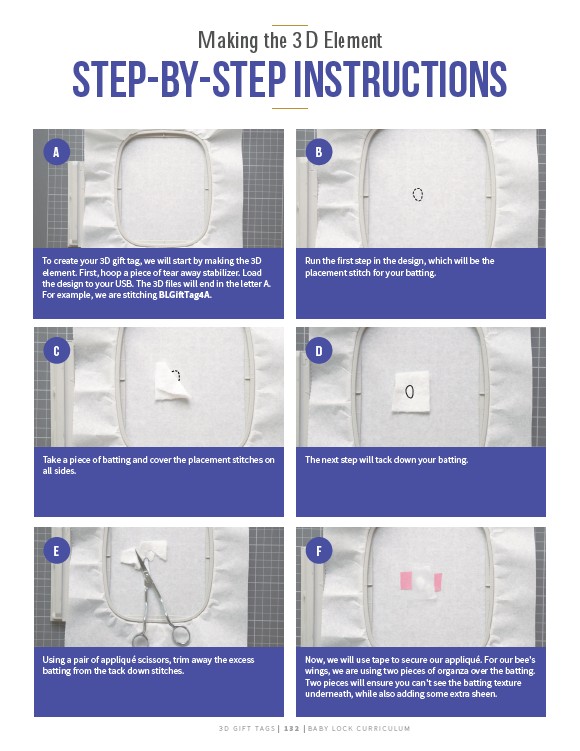
To create your 3D gift tag, we will start by making the 3D
element. First, hoop a piece of tear away stabilizer. Load
the design to your USB. The 3D files will end in the letter A.
For example, we are stitching BLGiftTag4A.
Run the first step in the design, which will be the
placement stitch for your batting.
C D
Take a piece of batting and cover the placement stitches on
all sides.
The next step will tack down your batting.
E F
Using a pair of appliqué scissors, trim away the excess
batting from the tack down stitches.
Now, we will use tape to secure our appliqué. For our bee's
wings, we are using two pieces of organza over the batting.
Two pieces will ensure you can't see the batting texture
underneath, while also adding some extra sheen.
3 D G I F T TAGS | 1 3 2 | BABY LO C K CU R R I CULUM