g h
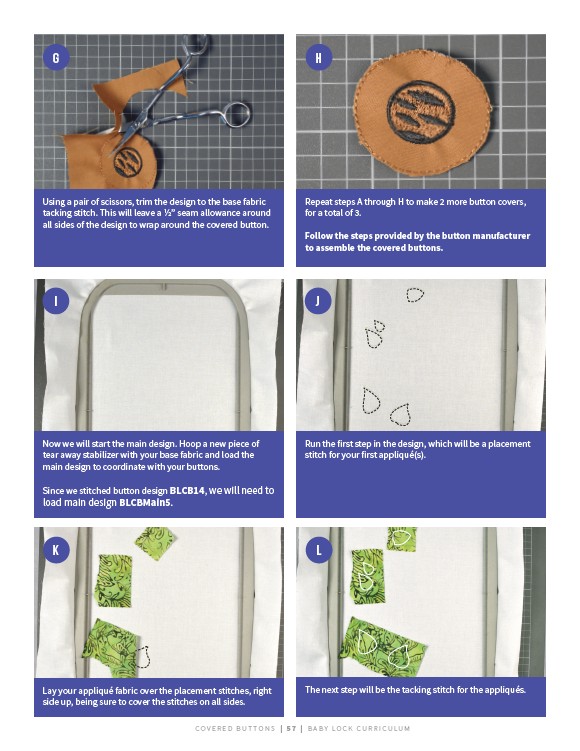
Using a pair of scissors, trim the design to the base fabric
tacking stitch. This will leave a 1/2” seam allowance around
all sides of the design to wrap around the covered button.
Repeat steps A through H to make 2 more button covers,
for a total of 3.
Follow the steps provided by the button manufacturer
to assemble the covered buttons.
I J
Now we will start the main design. Hoop a new piece of
tear away stabilizer with your base fabric and load the
main design to coordinate with your buttons.
Since we stitched button design BLCB14, we will need to
load main design BLCBMain5.
Run the first step in the design, which will be a placement
stitch for your first appliqué(s).
K L
Lay your appliqué fabric over the placement stitches, right
side up, being sure to cover the stitches on all sides.
The next step will be the tacking stitch for the appliqués.
COV E R E D B U T TONS | 5 7 | BABY LO C K CU R R I CULUM