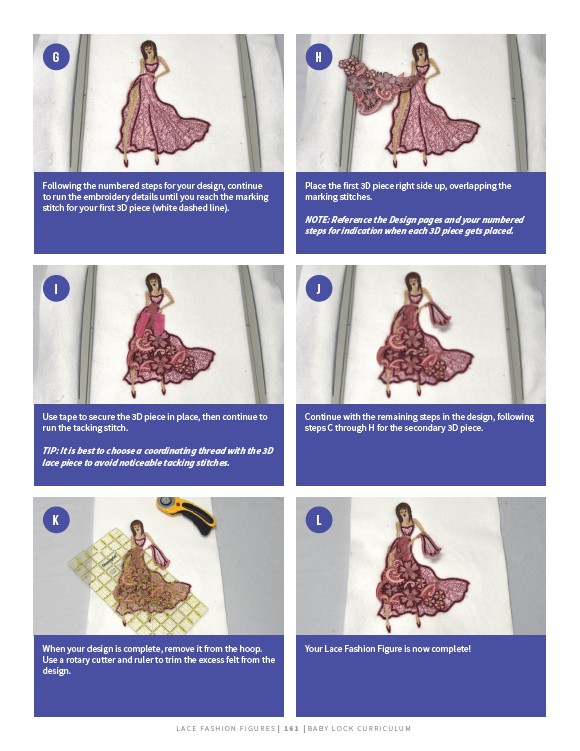
Following the numbered steps for your design, continue
to run the embroidery details until you reach the marking
stitch for your first 3D piece (white dashed line).
Place the first 3D piece right side up, overlapping the
marking stitches.
NOTE: Reference the Design pages and your numbered
steps for indication when each 3D piece gets placed.
Use tape to secure the 3D piece in place, then continue to
run the tacking stitch.
TIP: It is best to choose a coordinating thread with the 3D
lace piece to avoid noticeable tacking stitches.
Continue with the remaining steps in the design, following
steps C through H for the secondary 3D piece.
When your design is complete, remove it from the hoop.
Use a rotary cutter and ruler to trim the excess felt from the
design.
Your Lace Fashion Figure is now complete!
L AC E FA S H I O N F I G U R E S | 1 6 1 | BABY LO C K CU R R I CULUM
G
I
K
H
J
L