Step-by-Step
instructions
A B
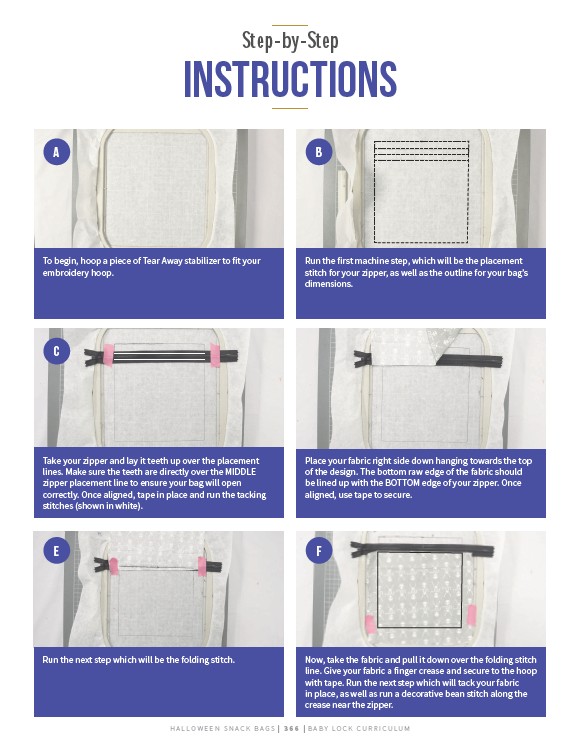
To begin, hoop a piece of Tear Away stabilizer to fit your
embroidery hoop.
Run the first machine step, which will be the placement
stitch for your zipper, as well as the outline for your bag’s
dimensions.
D
Take your zipper and lay it teeth up over the placement
lines. Make sure the teeth are directly over the MIDDLE
zipper placement line to ensure your bag will open
correctly. Once aligned, tape in place and run the tacking
stitches (shown in white).
Place your fabric right side down hanging towards the top
of the design. The bottom raw edge of the fabric should
be lined up with the BOTTOM edge of your zipper. Once
aligned, use tape to secure.
E F
Run the next step which will be the folding stitch. Now, take the fabric and pull it down over the folding stitch
line. Give your fabric a finger crease and secure to the hoop
with tape. Run the next step which will tack your fabric
in place, as well as run a decorative bean stitch along the
crease near the zipper.
H A L LOWEEN SNAC K B AGS | 3 6 6 | BABY LO C K CU R R I CULUM
C