Step-by-Step
Instructions
A B
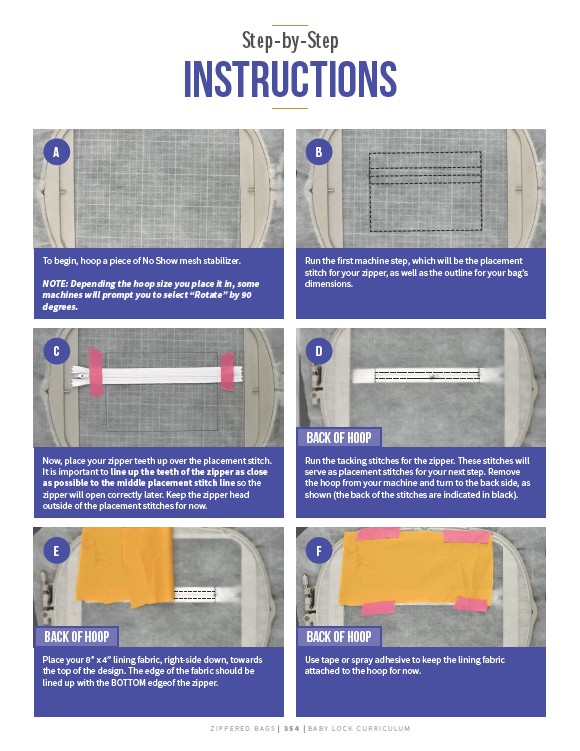
To begin, hoop a piece of No Show mesh stabilizer.
NOTE: Depending the hoop size you place it in, some
machines will prompt you to select “Rotate” by 90
degrees.
Run the first machine step, which will be the placement
stitch for your zipper, as well as the outline for your bag’s
dimensions.
C D
Now, place your zipper teeth up over the placement stitch.
It is important to line up the teeth of the zipper as close
as possible to the middle placement stitch line so the
zipper will open correctly later. Keep the zipper head
outside of the placement stitches for now.
Back of HOOP
Run the tacking stitches for the zipper. These stitches will
serve as placement stitches for your next step. Remove
the hoop from your machine and turn to the back side, as
shown (the back of the stitches are indicated in black).
E F
Back of HOOP Back of HOOP
Place your 8” x 4” lining fabric, right-side down, towards
the top of the design. The edge of the fabric should be
lined up with the BOTTOM edgeof the zipper.
Use tape or spray adhesive to keep the lining fabric
attached to the hoop for now.
Z I P P E R E D B AGS | 3 5 4 | BABY LO C K CU R R I CULUM