Step-by-Step
instructions
A B
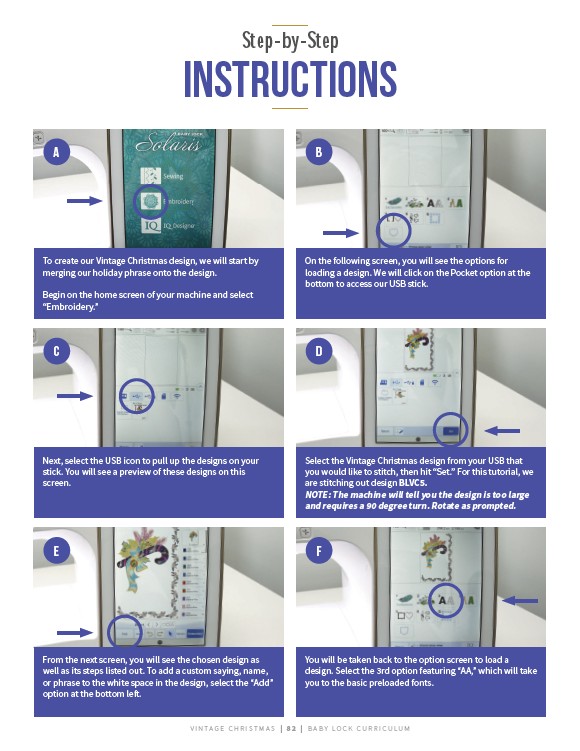
To create our Vintage Christmas design, we will start by
merging our holiday phrase onto the design.
Begin on the home screen of your machine and select
“Embroidery.”
On the following screen, you will see the options for
loading a design. We will click on the Pocket option at the
bottom to access our USB stick.
C D
Next, select the USB icon to pull up the designs on your
stick. You will see a preview of these designs on this
screen.
Select the Vintage Christmas design from your USB that
you would like to stitch, then hit “Set.” For this tutorial, we
are stitching out design BLVC5.
NOTE: The machine will tell you the design is too large
and requires a 90 degree turn. Rotate as prompted.
E F
From the next screen, you will see the chosen design as
well as its steps listed out. To add a custom saying, name,
or phrase to the white space in the design, select the “Add”
option at the bottom left.
You will be taken back to the option screen to load a
design. Select the 3rd option featuring “AA,” which will take
you to the basic preloaded fonts.
V I N TAG E C H R I STMAS | 8 2 | BABY LO C K CU R R I CULUM