Creating the 3D Elements
Step-by-step instructions
B
D
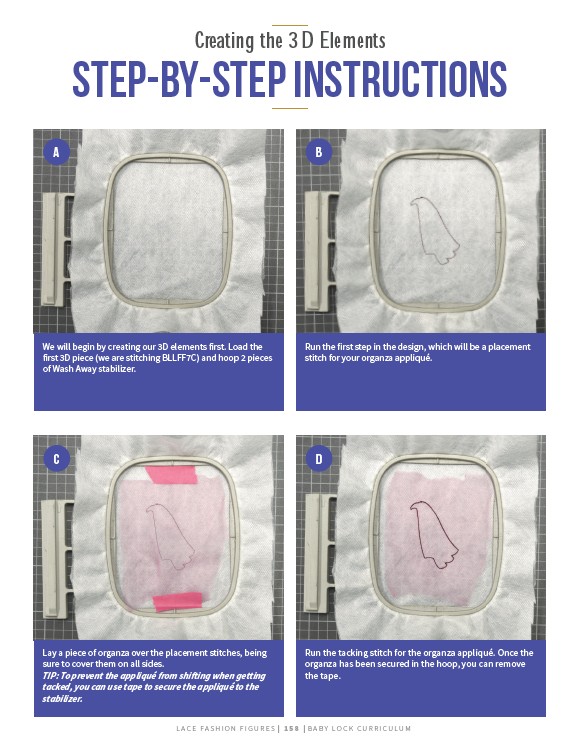
We will begin by creating our 3D elements first. Load the
first 3D piece (we are stitching BLLFF7C) and hoop 2 pieces
of Wash Away stabilizer.
L AC E FA S H I O N F I G U R E S | 1 5 8 | BABY LO C K CU R R I CULUM
A
C
Lay a piece of organza over the placement stitches, being
sure to cover them on all sides.
TIP: To prevent the appliqué from shifting when getting
tacked, you can use tape to secure the appliqué to the
stabilizer.
Run the first step in the design, which will be a placement
stitch for your organza appliqué.
Run the tacking stitch for the organza appliqué. Once the
organza has been secured in the hoop, you can remove
the tape.