Step-by-Step
Instructions
B
D
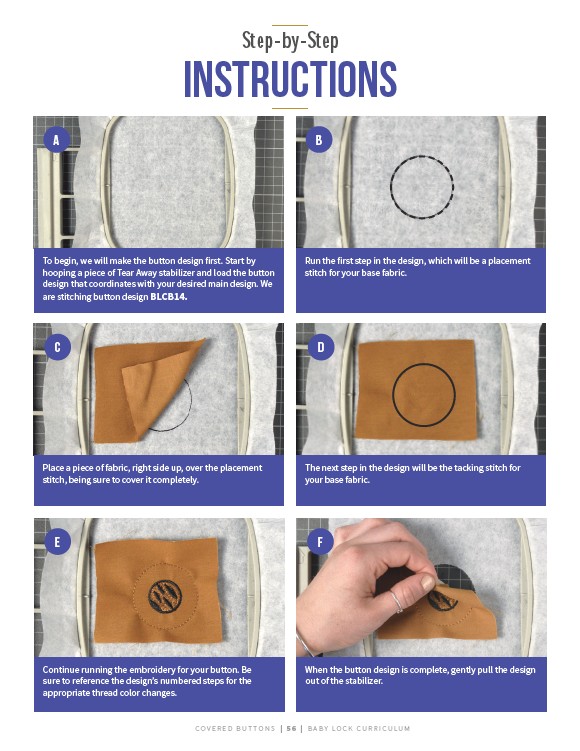
To begin, we will make the button design first. Start by
hooping a piece of Tear Away stabilizer and load the button
design that coordinates with your desired main design. We
are stitching button design BLCB14.
COV E R E D B U T TONS | 5 6 | BABY LO C K CU R R I CULUM
A
C
Place a piece of fabric, right side up, over the placement
stitch, being sure to cover it completely.
Run the first step in the design, which will be a placement
stitch for your base fabric.
The next step in the design will be the tacking stitch for
your base fabric.
e f
Continue running the embroidery for your button. Be
sure to reference the design’s numbered steps for the
appropriate thread color changes.
When the button design is complete, gently pull the design
out of the stabilizer.