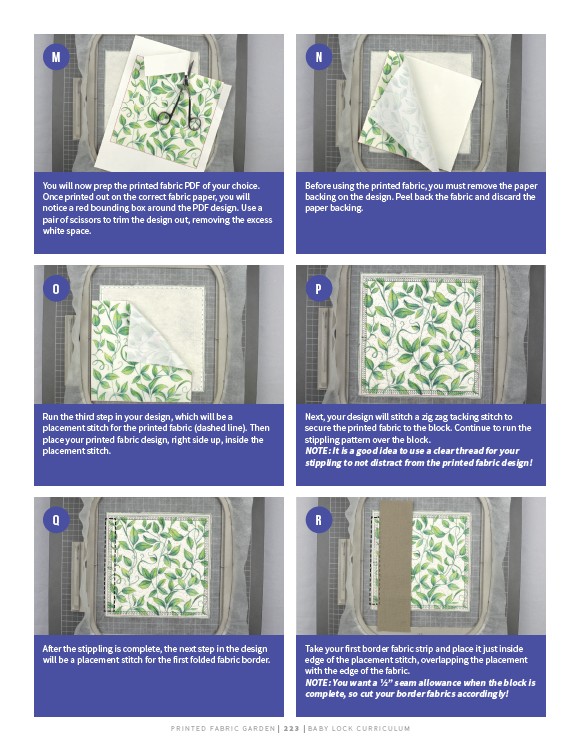
You will now prep the printed fabric PDF of your choice.
Once printed out on the correct fabric paper, you will
notice a red bounding box around the PDF design. Use a
pair of scissors to trim the design out, removing the excess
white space.
Before using the printed fabric, you must remove the paper
backing on the design. Peel back the fabric and discard the
paper backing.
Run the third step in your design, which will be a
placement stitch for the printed fabric (dashed line). Then
place your printed fabric design, right side up, inside the
placement stitch.
Next, your design will stitch a zig zag tacking stitch to
secure the printed fabric to the block. Continue to run the
stippling pattern over the block.
NOTE: It is a good idea to use a clear thread for your
stippling to not distract from the printed fabric design!
After the stippling is complete, the next step in the design
will be a placement stitch for the first folded fabric border.
Take your first border fabric strip and place it just inside
edge of the placement stitch, overlapping the placement
with the edge of the fabric.
NOTE: You want a 1/2” seam allowance when the block is
complete, so cut your border fabrics accordingly!
P R I N T E D FA B R I C G A R D E N | 2 2 3 | BABY LO C K CU R R I CULUM
M
O
Q
N
P
R