Step-by-Step
instructions
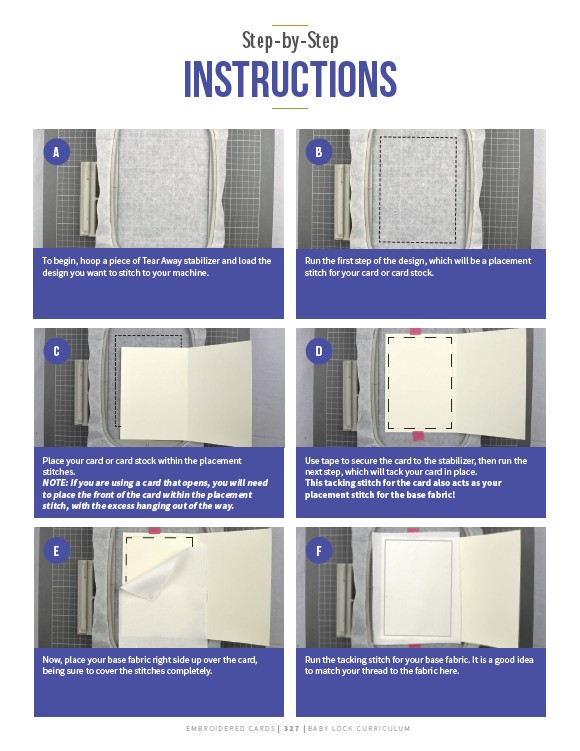
B
E F
E M B R O I D E R E D C A R D S | 3 2 7 | BABY LO C K CU R R I CULUM
A
To begin, hoop a piece of Tear Away stabilizer and load the
design you want to stitch to your machine.
Run the first step of the design, which will be a placement
stitch for your card or card stock.
C D
Place your card or card stock within the placement
stitches.
NOTE: If you are using a card that opens, you will need
to place the front of the card within the placement
stitch, with the excess hanging out of the way.
Use tape to secure the card to the stabilizer, then run the
next step, which will tack your card in place.
This tacking stitch for the card also acts as your
placement stitch for the base fabric!
Now, place your base fabric right side up over the card,
being sure to cover the stitches completely.
Run the tacking stitch for your base fabric. It is a good idea
to match your thread to the fabric here.