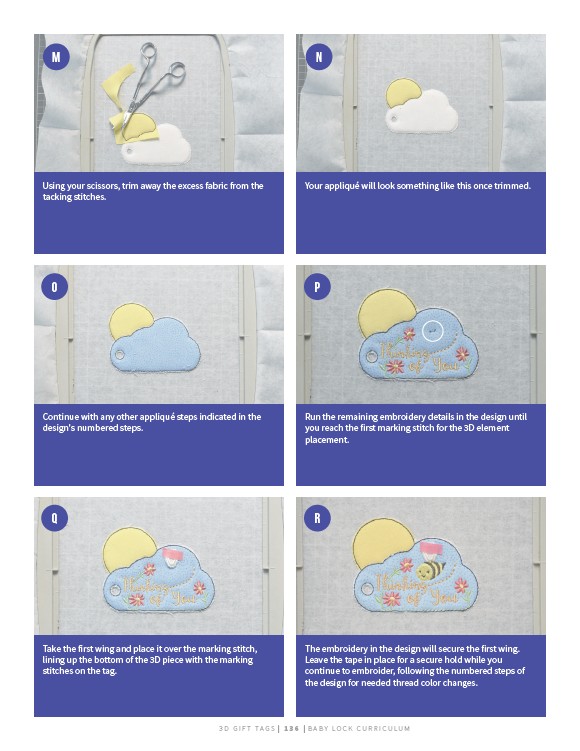
Using your scissors, trim away the excess fabric from the
tacking stitches.
Your appliqué will look something like this once trimmed.
Continue with any other appliqué steps indicated in the
design's numbered steps.
Run the remaining embroidery details in the design until
you reach the first marking stitch for the 3D element
placement.
Take the first wing and place it over the marking stitch,
lining up the bottom of the 3D piece with the marking
stitches on the tag.
The embroidery in the design will secure the first wing.
Leave the tape in place for a secure hold while you
continue to embroider, following the numbered steps of
the design for needed thread color changes.
3 D G I F T TAGS | 1 3 6 | BABY LO C K CU R R I CULUM
M
O
Q
N
P
R