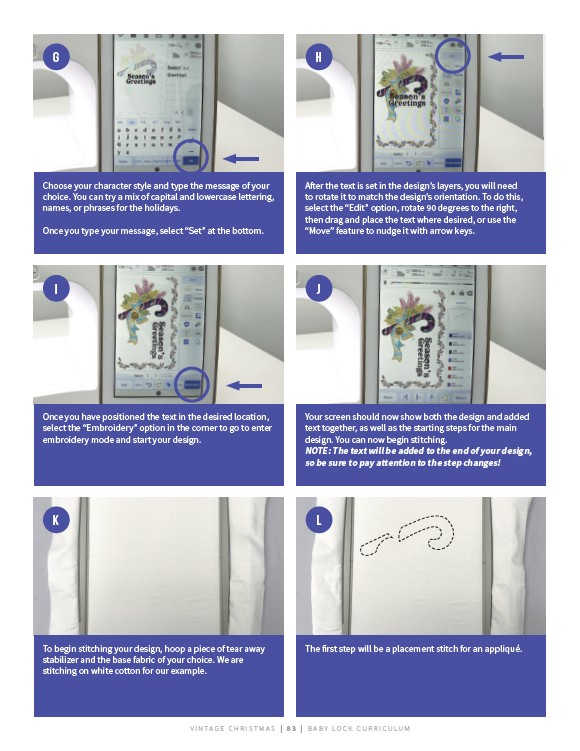
Choose your character style and type the message of your
choice. You can try a mix of capital and lowercase lettering,
names, or phrases for the holidays.
Once you type your message, select “Set” at the bottom.
After the text is set in the design’s layers, you will need
to rotate it to match the design’s orientation. To do this,
select the “Edit” option, rotate 90 degrees to the right,
then drag and place the text where desired, or use the
“Move” feature to nudge it with arrow keys.
Once you have positioned the text in the desired location,
select the “Embroidery” option in the corner to go to enter
embroidery mode and start your design.
Your screen should now show both the design and added
text together, as well as the starting steps for the main
design. You can now begin stitching.
NOTE: The text will be added to the end of your design,
so be sure to pay attention to the step changes!
To begin stitching your design, hoop a piece of tear away
stabilizer and the base fabric of your choice. We are
stitching on white cotton for our example.
The first step will be a placement stitch for an appliqué.
V I N TAG E C H R I STMAS | 8 3 | BABY LO C K CU R R I CULUM
G
I
K
H
J
L